DIY Solar Generator: Your Green Energy Solution
As an Amazon Associate, I earn from qualifying purchases, at no additional cost to you. Disclaimer
Do you ever fantasize about living off the grid, harnessing the sun’s power for all your energy needs? A DIY solar generator might be the solution for you. Let’s explore together.
What is a DIY Solar Generator?
Imagine the freedom of generating your own electricity using the power of the sun. A DIY solar generator is a fascinating and rewarding project that allows you to harness the sun’s energy and convert it into usable electricity. Whether you’re looking to reduce your carbon footprint, save money on energy bills, or prepare for emergencies, building a DIY solar generator is a fantastic solution that puts the power in your hands.
The Solar Power Advantage
Harnessing solar power has numerous advantages, making it an increasingly popular choice for eco-conscious individuals. One of the greatest benefits of solar power is its renewable nature. Unlike fossil fuels, which are finite resources that harm the environment, solar power relies on the sun, which will continue to shine for billions of years. By embracing solar energy, you’re contributing to a sustainable future and reducing your reliance on non-renewable resources.
Another advantage of solar power is its clean and emission-free nature. When you use a solar generator, you’re not releasing harmful pollutants or greenhouse gases into the atmosphere. This not only improves air quality but also helps combat climate change. By choosing solar power, you’re actively participating in the fight against environmental degradation and working towards a greener planet.
Components of a Solar Generator
To understand how a solar generator works, let’s break down its key components:
Solar Panel: The solar panel is the heart of your solar generator. It absorbs sunlight and converts it into electricity through the photovoltaic effect. When sunlight strikes the solar cells within the panel, electrons are excited and create a flow of direct current (DC) electricity.
Battery: The battery is the energy storage unit of your solar generator. It stores the electricity generated by the solar panel so that you can use it later, even when the sun isn’t shining. Choosing the right battery is crucial for maximizing the efficiency and longevity of your solar generator.
Charge Controller: The charge controller acts as a regulator between the solar panel and the battery. Its primary function is to prevent overcharging and over-discharging of the battery, ensuring its optimal performance and lifespan. A good charge controller also provides important information about the charging status and battery health.
Inverter: The inverter is responsible for converting the DC power stored in the battery into alternating current (AC) power, which is the type of electricity used by most household appliances and electronics. With the help of an inverter, you can power various devices and enjoy the comforts of modern living even when you’re off-grid.
Steps to Build Your DIY Solar Generator
Building a DIY solar generator may seem daunting, especially if you’ve never undertaken such a project before. However, with a little guidance and determination, you can successfully create your own green energy solution. Let me share some practical advice and tips to help you get started.
Gathering Your Materials
Before embarking on your DIY solar generator project, gather all the necessary materials. Here’s a list of essential components and tools you’ll need:
Essential Solar Generator Components
- Solar panel(s) with appropriate wattage and efficiency for your energy needs.
- Deep-cycle battery with sufficient capacity to store the energy generated.
- Charge controller that matches the specifications of your solar panel and battery.
- Inverter capable of converting DC power to AC power with the desired wattage.
- Cables and connectors to establish the necessary connections.
- Mounting hardware to secure your solar panel in place.
- Fuse or circuit breaker for safety purposes.
Other Useful Tools
- Screwdriver, wrench, and pliers for assembling the components.
- Wire cutters and strippers for working with cables.
- Multimeter to measure voltage, current, and resistance.
- Silicone sealant to protect connections from moisture.
- Insulation tape or heat shrink tubing to secure and insulate wires.
By having all the materials and tools ready, you can streamline the assembly process and avoid unnecessary delays.
Assembling the Solar Generator
Building your DIY solar generator is an exciting journey that requires careful attention to detail.
Follow these steps to bring your solar generator to life:
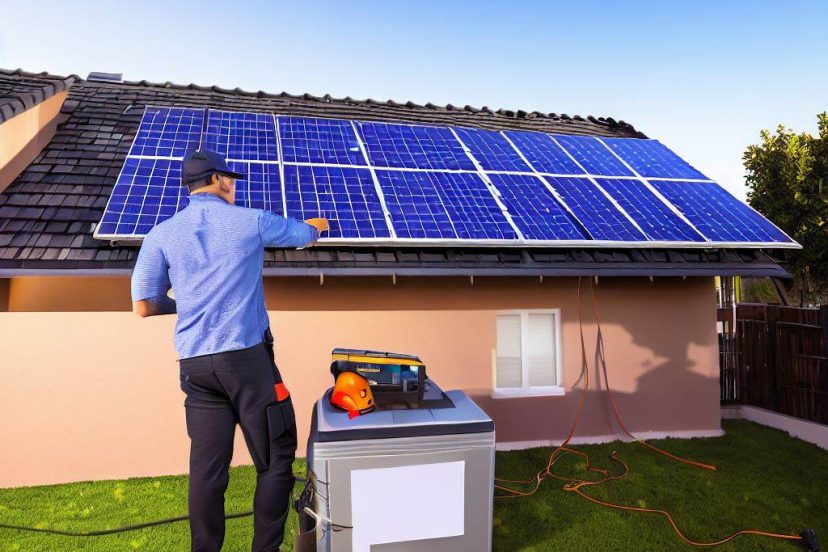
Setting Up the Solar Panel
Choose a suitable location for your solar panel where it can receive maximum sunlight throughout the day. Orient the panel toward the sun, preferably facing south in the Northern Hemisphere or north in the Southern Hemisphere. Ensure there are no obstructions like trees or buildings casting shadows on the panel. Use the provided mounting hardware or a sturdy frame to secure the solar panel in place.
Connecting the Charge Controller
Begin by connecting the solar panel to the charge controller. The charge controller regulates the flow of electricity from the solar panel to the battery. Connect the positive (+) and negative (-) terminals of the solar panel to the corresponding terminals on the charge controller. Ensure the connections are secure and tight to minimize power loss.
Wiring the Inverter
Next, wire the inverter to the battery. Connect the positive (+) and negative (-) terminals of the battery to the corresponding terminals on the inverter. Take precautions to avoid accidental short circuits and ensure proper insulation of the connections.
Adding the Battery
Connect the charge controller to the battery by following the manufacturer’s instructions. Typically, you’ll connect the positive (+) terminal of the charge controller to the positive (+) terminal of the battery and the negative (-) terminal of the charge controller to the negative (-) terminal of the battery. Double-check the polarity to avoid any damage.
Once all the connections are secure, turn on your solar generator and check the voltage readings on the charge controller. It should indicate that the battery is charging. Congratulations! You have successfully assembled your DIY solar generator.
Remember to refer to the instruction manuals provided with your specific components for detailed wiring diagrams and safety guidelines. Taking proper precautions throughout the assembly process will ensure the longevity and safety of your solar generator.
Maintaining Your DIY Solar Generator
To keep your DIY solar generator running smoothly and efficiently, regular maintenance is essential. Here are some maintenance tips to follow:
Regular Cleaning
Dirt, dust, and debris can accumulate on the surface of your solar panels, reducing their efficiency. Clean your solar panels at least twice a year, or more frequently if you live in a dusty or polluted area. Use a soft cloth or sponge with mild detergent and water to gently wipe the surface. Avoid using abrasive materials that could scratch or damage the panels. Regular cleaning will help maximize solar absorption and energy production.
Battery Maintenance
Keep an eye on your battery’s performance and health. Check the battery’s voltage periodically using a multimeter to ensure it’s within the recommended range. Inspect the battery terminals for corrosion and clean them with a mixture of baking soda and water if necessary. If your battery shows signs of deterioration or struggles to hold a charge, consider replacing it promptly to maintain optimal energy storage.
Component Check
Regularly inspect all components of your solar generator for any signs of wear, damage, or loose connections. Check the wiring, terminals, and connectors to ensure they’re secure and in good condition. Look for frayed or damaged wires and replace them as needed. By performing routine checks, you can identify potential issues early and address them promptly, ensuring the longevity and performance of your DIY solar generator.
By following these maintenance practices, you can maximize the lifespan of your solar generator and enjoy reliable green energy for years to come.
Why Choose a DIY Solar Generator?
Now that you have an understanding of what a DIY solar generator entails, let’s explore why it’s a worthwhile choice for eco-conscious individuals and off-grid enthusiasts.
Environmental Impact
Opting for a DIY solar generator means embracing a clean and sustainable energy solution. By utilizing the power of the sun, you’re reducing your reliance on fossil fuels, minimizing harmful emissions, and contributing to a healthier planet. Each kilowatt-hour of solar-generated electricity saves significant amounts of CO2 emissions, helping combat climate change and preserving the environment for future generations.
Cost Effectiveness
While there may be an initial investment involved in building a DIY solar generator, it’s a cost-effective choice in the long run. By producing your own electricity, you can reduce or eliminate your monthly energy bills, saving money over time. Additionally, with proper maintenance, your solar generator can provide decades of reliable service, offering a substantial return on your investment.
Energy Independence
One of the most appealing aspects of a DIY solar generator is the freedom it provides. With your own solar power solution, you’re not reliant on the grid for electricity. This independence is especially valuable in remote areas, during power outages, or in emergency situations. Whether you’re camping in the wilderness or facing a natural disaster, your solar generator ensures that you have a reliable source of power to meet your needs.
Conclusion
Embarking on a DIY solar generator project allows you to tap into the potential of solar energy and take control of your electricity generation. By following the steps outlined and maintaining your solar generator properly, you can enjoy the benefits of clean, renewable energy while reducing your carbon footprint and gaining energy independence. Embrace the power of the sun and start your journey towards a greener and more sustainable future.
You’ve got this!
-Michael
Frequently Asked Questions (FAQs)
1. What type of battery is best for a solar generator?
When choosing a battery for your solar generator, deep-cycle batteries are generally the best option.
2. Can a solar generator power my entire house?
The capacity of a DIY solar generator may not be enough to power an entire house, especially if you have high energy demands. However, you can scale up your solar system by adding more panels, batteries, and an inverter to meet larger energy needs.
3. What can I do if my solar generator isn’t producing enough power?
There are a few things you can check:
- Ensure that your solar panels are positioned correctly.
- Check the connections between the solar panels, charge controller, battery, and inverter.
- Verify that your battery is in good condition and holding a charge.
- Consider adding more solar panels to increase the power output.
4. How do I calculate how many solar panels I need?
To calculate the number of solar panels you need, you should consider your energy consumption and the solar panel’s wattage. Start by determining your daily energy usage in kilowatt-hours (kWh) and divide it by the average daily sun hours in your location. Then, divide this value by the wattage of the solar panel you plan to use. This calculation will give you an estimate of the number of panels required.
5. How long will my solar generator last?
The lifespan of a solar generator depends on the quality of the components, maintenance, and usage. Generally, high-quality solar panels can last 25-30 years, while batteries typically last around 5-15 years. Proper maintenance, such as regular cleaning and battery checks, can help prolong the lifespan of your solar generator.