
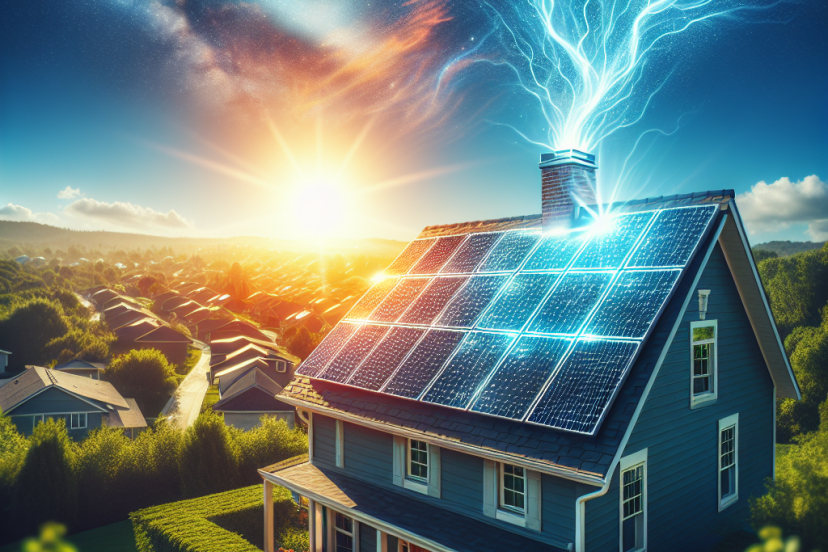
How To Install Solar Panels On Roof
As an Amazon Associate, I earn from qualifying purchases, at no additional cost to you. Disclaimer
installing solar panels on your roof can be a significant step towards reducing your carbon footprint and saving money on your energy bills. In this article, I will guide you through the process of installing solar panels on your roof, providing you with valuable tips and step-by-step instructions to make the installation process seamless and efficient. By following these guidelines, you will be able to harness the power of the sun and embrace a more sustainable energy source for your home. So, let’s get started on this renewable energy journey together!
Understanding Solar Panels
Solar panels are becoming an increasingly popular choice for harnessing renewable energy. Harnessing the power of the sun, solar panels convert sunlight into clean electricity that can be used to power homes, businesses, and even entire communities. In this comprehensive guide, I will walk you through the basics of solar power, types of solar panels available, and the numerous benefits of utilizing solar energy.

Basics of solar power
Solar power is generated through the use of photovoltaic (PV) cells, which are the building blocks of solar panels. These cells contain materials, such as silicon, that undergo a chemical reaction when exposed to sunlight. This reaction creates an electrical current, which can then be harnessed and utilized as electricity. This process, known as the photovoltaic effect, is the fundamental principle behind solar power generation.
Types of solar panels
There are several types of solar panels to choose from, each with its own unique characteristics and advantages. The most common types include monocrystalline, polycrystalline, and thin-film solar panels.
Monocrystalline panels: These panels are made from a single crystal structure, resulting in high efficiency and a sleeker appearance. They are typically more expensive but offer better performance in limited spaces.
Polycrystalline panels: These panels are made from multiple silicon crystals, resulting in a slightly lower efficiency compared to monocrystalline panels. However, they are more affordable and ideal for larger rooftop installations.
Thin-film panels: These panels are made by depositing a thin layer of semiconductor material onto a substrate. Thin-film panels are flexible and lightweight, making them suitable for unique installation scenarios or non-traditional surfaces.
It is important to consider your specific needs and budget when selecting the right type of solar panel for your installation.
Benefits of solar energy
Utilizing solar energy offers numerous benefits for both individuals and the environment:
Renewable and sustainable: Solar power relies on the sun, which is a virtually limitless source of energy. Unlike fossil fuels, solar energy will not deplete over time.
Cost savings: By generating your own electricity, you can significantly reduce your utility bills. Solar energy can provide long-term cost savings, especially as energy prices continue to rise.
Environmental impact: Solar energy is a clean and green alternative to traditional energy sources. It produces no greenhouse gases or other harmful emissions, reducing our carbon footprint and mitigating climate change.
Energy independence: With solar panels installed, you become less reliant on the grid and can have a constant supply of electricity, even during power outages.
Longevity and durability: High-quality solar panels can last for several decades with proper maintenance, making them a long-term investment.
Considering these benefits, it is clear why solar energy is an attractive option for those looking to make a positive impact both economically and environmentally.
Considerations Before Installation
Before diving into the installation process, there are several important factors to consider to ensure a successful solar panel installation. These considerations include assessing the suitability of your roof, evaluating the solar energy potential in your area, and complying with local permits and regulations.
Roof suitability
The first step in the installation process is to assess the suitability of your roof for solar panel installation. Here are some key factors to consider:
Structural integrity: Your roof should be structurally sound and able to support the weight of the solar panels. Consult with a professional to assess the structural integrity of your roof if you have any concerns.
Roof age: If your roof is nearing the end of its lifespan, it may be wise to replace it before installing solar panels to avoid having to remove and reinstall them in the near future.
Roof material: Different roofing materials may require specific mounting methods. Consider the compatibility of your roof material with the installation process.
Shading: Shading from nearby trees, buildings, or other obstacles can significantly reduce the efficiency of your solar panels. Ensure that your roof receives ample direct sunlight throughout the day.

Solar energy potential
It is crucial to evaluate the solar energy potential in your area before deciding to install solar panels. Factors that influence solar energy potential include:
Climate and weather patterns: Areas with abundant sunlight and fewer cloudy days are more favorable for solar energy production.
Latitude and tilt angle: The amount of sunlight a solar panel can capture depends on its tilt angle and the latitude of the installation site. Optimal tilt angles vary by location, and your installer can help determine the ideal angle for your specific area.
Orientation: The direction your roof faces plays a significant role in solar energy potential. South-facing roofs typically receive the most sunlight in the northern hemisphere, while north-facing roofs are optimal in the southern hemisphere.
Obstructions: Evaluate whether any surrounding buildings, trees, or other structures may cast shadows on your panels during peak sunlight hours.
Local permits and regulations
Before proceeding with your solar panel installation, it is important to familiarize yourself with the local permits and regulations governing solar energy systems. Some key considerations include:
Building permits: Most jurisdictions require building permits for installing solar panels. Check with your local building department to determine the necessary permits and any associated fees.
Homeowner association (HOA) guidelines: If you live in a community governed by an HOA, ensure that you review their guidelines and obtain any necessary approvals before installing solar panels.
Utility interconnection agreements: Contact your utility company to understand their requirements for connecting your solar panel system to the grid. This process, known as net metering, allows you to earn credits for excess electricity generated.
By considering these factors beforehand, you can ensure a smooth and compliant solar panel installation process.
Choosing the Right Solar Panels
Selecting the right solar panels for your installation is a crucial decision. To make an informed choice, it is important to evaluate your energy needs, compare panel efficiency, and consider your budget constraints.
Evaluating energy needs
Analyzing your energy needs is the first step in choosing the right solar panels. Take into account your average monthly electricity consumption and consider any anticipated changes in usage. You can typically find this information on your utility bills or by consulting with an energy consultant.
Comparing panel efficiency
Panel efficiency refers to how effectively a solar panel converts sunlight into electricity. Higher efficiency panels produce more electricity per square foot, allowing you to generate more power in limited space. However, increased efficiency often comes at a higher cost. Consider your available roof space and the desired amount of electricity generation when comparing panel efficiency.

Considering budget constraints
Solar panel installations can vary significantly in cost, so it is essential to establish a budget before selecting panels. Factors that influence the cost include the type and brand of the panels, the size of the system, and any additional components required for installation. Strike a balance between your budget and the desired performance and durability of the panels to make the best decision for your needs.
Preparing for Installation
A successful solar panel installation requires proper preparation. This includes deciding whether to hire a professional installer or embark on a do-it-yourself (DIY) project, gathering necessary tools and equipment, and adhering to safety precautions to ensure a smooth and safe installation process.
Choosing a professional installer vs DIY
Deciding whether to hire a professional installer or tackle the installation yourself depends on various factors. While hiring a professional ensures expertise and guarantees a proper installation, it can be more costly. Conversely, a DIY approach can save money but requires a good understanding of the installation process and electrical work. Consider your level of expertise, available time, and budget when making this decision.
Gathering necessary tools and equipment
Whether you choose to hire a professional or embark on a DIY installation, there are several tools and equipment you may need for the project. These can include:
Ladder or scaffolding: Depending on the height of your roof, you may need a ladder or scaffolding to access the installation area safely.
Hand tools: Screwdrivers, wrenches, pliers, and wire cutters are commonly used tools during the installation process.
Drill and drill bits: A drill is useful for creating necessary holes in the mounting brackets and making installations.
Measuring tools: A tape measure, level, and angle finder can help ensure accurate installation and alignment.
Safety equipment: Safety goggles, gloves, and a hard hat are essential for protecting yourself during the installation process.
Ensure you have all the necessary tools and equipment readily available before beginning the installation to avoid delays or safety hazards.
Safety precautions
When working with solar panels, it is important to prioritize safety. Ensure you adhere to the following safety precautions:
Power shutdown: Before beginning any installation work, turn off the power supply to the area where the panels will be installed.
Knowledge of electrical systems: Familiarize yourself with electrical systems and best practices or consider hiring a licensed electrician for any electrical work that may be required during the installation.
Weather conditions: Avoid working on your roof during extreme weather conditions, such as high winds or heavy rain, as it can pose a safety risk.
Personal protective equipment (PPE): Wear appropriate safety gear, including gloves, safety goggles, and a hard hat, to protect yourself from any potential hazards.
By taking these safety precautions, you can ensure a safe and successful installation process.
Inspecting the Roof
Before proceeding with the actual installation, it is important to thoroughly inspect your roof. This inspection involves checking the roof’s integrity, measuring available roof space, and determining the ideal roof orientation for maximum sun exposure.

Checking roof integrity
A thorough inspection of your roof ensures that it is in good condition to support the installation of solar panels. Look out for any signs of damage, such as leaks, loose shingles, or sagging areas. Repair any issues or consult with a professional to address any concerns before proceeding with the installation.
Measuring available roof space
Measuring your available roof space is essential to determine how many solar panels can be installed and decide on the optimal layout. Measure the dimensions of the unobstructed roof area where you plan to install the panels, taking into account any obstructions like vents or chimneys. This measurement will help determine the number of panels you can accommodate.
Sorting ideal roof orientation for maximum sun exposure
Determining the ideal roof orientation is crucial for maximizing the energy output of your solar panels. In the northern hemisphere, roofs facing south typically receive the most sunlight throughout the day. However, east and west facing roofs can also be viable options, depending on your location and available roof space. Consult with a solar professional or use online tools to assess the sun exposure and shading on your roof throughout the day to determine the best orientation.
By carefully inspecting your roof and considering these factors, you can ensure that your solar panels are installed in the most optimal position for maximum energy production.
Mounting the Solar Panels
Once the roof inspection is complete, it’s time to move on to the mounting process. This involves understanding the mounting hardware, installing the mounting brackets, and attaching the solar panels securely.
Understanding the mounting hardware
Mounting hardware is essential for securely fastening the solar panels to your roof. Common mounting hardware includes standoff posts, rails, clamps, and flashing. Standoff posts help elevate the panels, rails provide a framework to attach the panels, clamps secure the panels to the rails, and flashing provides a watertight seal around the mounting brackets. Familiarize yourself with the specific mounting hardware provided with your solar panel system to ensure proper installation.

Installing the mounting brackets
Installing the mounting brackets is a critical step in the installation process. The mounting brackets serve as the foundation for the solar panels and should be securely attached to your roof. Follow the manufacturer’s instructions to determine the appropriate spacing and alignment for the brackets. Use a drill and appropriate drill bits to create holes for the mounting brackets and then attach them securely to your roof using the provided hardware.
Attaching the solar panels
Once the mounting brackets are in place, it’s time to attach the solar panels. Carefully lift each panel onto the roof and align them with the installed brackets. Attach the panels to the mounting brackets using the provided clamps or other fastening mechanisms. Ensure that the panels are securely attached and evenly spaced to avoid any potential issues.
By understanding the mounting hardware, properly installing the mounting brackets, and securely attaching the solar panels, you can ensure a sturdy and reliable solar panel installation.
Wiring the Solar Panels
Properly wiring the solar panels is a crucial step in the installation process. This involves understanding the wiring diagram, connecting the solar panels in series or parallel, and running the cables to the inverter.
Understanding the wiring diagram
The wiring diagram provided with your solar panel system outlines the connections necessary for proper functioning. It typically includes information on how the panels should be connected, the placement of inverters and charge controllers, and the grounding requirements. Study the wiring diagram carefully to ensure accurate connections and follow any specific instructions provided.
Connecting the solar panels in series or parallel
The configuration in which you connect your solar panels can significantly impact the overall performance of your system. The two primary configurations are connecting panels in series or parallel.
Series connection: In a series connection, the positive (+) terminal of one panel is connected to the negative (-) terminal of the next panel. This configuration increases the total voltage output of the system while maintaining a constant current.
Parallel connection: In a parallel connection, the positive (+) terminals of all panels are connected together, and the negative (-) terminals are connected together. This setup maintains a constant voltage while increasing the total current output.
The choice between series and parallel connections depends on your specific system requirements and the inverters being used. Consult the wiring diagram and any manufacturer guidelines to determine the appropriate configuration for your installation.
Running the cables to the inverter
Running the cables from the solar panels to the inverter is the final step in wiring the system. Begin by routing the cables from the panels to a designated location on your roof where the inverter will be installed. Ensure that the cables are well-protected and secured to prevent any damage or tripping hazards. From the roof, route the cables down the side of your house or through an attic, if applicable, to the location of the inverter. Follow any local electrical codes and consult with a licensed electrician if needed, especially when connecting to the electrical grid.
By understanding the wiring diagram, carefully connecting the solar panels, and running the cables to the inverter, you can ensure a proper and safe electrical connection.
Connecting to the Grid
Connecting your solar panel system to the electrical grid is a vital step that requires professional assistance. This involves hiring an electrician for grid connection, understanding net metering, and setting up the inverter for grid connection.
Hiring an electrician for grid connection
Connecting your solar panel system to the electrical grid should always be done by a licensed electrician. The electrician will have the necessary expertise and knowledge to ensure a safe and compliant connection. They will handle tasks such as installing an appropriate electrical panel, wiring the inverter to the electrical grid, and conducting any required inspections or tests.
Understanding net metering
Net metering is a billing arrangement that allows you to receive credit for excess electricity generated by your solar panel system. When your panels produce more electricity than you consume, the excess is sent back to the grid, and you earn credits on your utility bill. This allows you to offset the electricity you consume from the grid during times when your solar panels are not producing enough power. Contact your utility company to understand their net metering policies and any necessary paperwork or agreements.
Setting up the inverter for grid connection
The inverter is a critical component that converts the direct current (DC) electricity generated by your solar panels into the alternating current (AC) electricity used in households and businesses. Set up the inverter according to the manufacturer’s instructions, ensuring proper electrical connections and confirming that it is compatible with the electrical grid and local regulations. An electrician should handle the final connection to the grid to ensure safety and compliance.
By hiring an electrician for grid connection, understanding net metering, and setting up the inverter correctly, you can seamlessly integrate your solar panel system into the electrical grid.
Testing the Solar Panel System
Once the solar panel system is installed and connected, thorough testing is necessary to ensure optimal performance. Testing involves checking for proper installation, verifying system performance, and troubleshooting common problems.
Checking for proper installation
Inspecting the installation to ensure it meets all safety and performance requirements is essential before starting the system. Here are a few key points to consider:
Secure fastening: Double-check that all solar panels are securely attached to the mounting brackets, and all brackets are securely attached to your roof.
Proper wiring: Ensure that all wiring connections are secure and correctly aligned according to the wiring diagram provided.
Grounding: Confirm that the system is correctly grounded to prevent electrical hazards.
Safety labels and warnings: Check for the presence of safety labels and warnings on your solar panel system, providing important information and precautions.
Verifying system performance
To verify the performance of your solar panel system, monitor the electricity production and compare it to your anticipated energy needs. Use a monitoring system or online monitoring tools provided by your solar panel manufacturer to track and analyze the system’s performance. Be observant of any sudden drops in output or issues with individual panels, as they may indicate a problem that requires further attention.
Troubleshooting common problems
Even with proper installation, occasional issues may arise. Some common problems include faulty wiring connections, inverter malfunctions, or damage to individual panels. If you encounter any issues, consult the troubleshooting guide provided by your system manufacturer or seek professional assistance from an electrician or solar panel specialist. Timely identification and resolution of problems will help ensure that your solar panel system operates optimally.
By conducting thorough testing, addressing any installation issues, and monitoring system performance, you can maximize the effectiveness and longevity of your solar panel system.
Maintenance and Upkeep
To ensure your solar panel system continues to operate at its best, regular maintenance and upkeep are essential. This includes cleaning the solar panels, inspecting the system regularly, and addressing any small repairs or issues promptly.
Cleaning the solar panels
Dirt, dust, leaves, and other debris can accumulate on the surface of the solar panels over time, reducing their efficiency. Regularly clean the panels to remove any buildup that may hinder sunlight absorption. Use a soft cloth or sponge with a mild soapy water solution to gently wipe away dirt. Avoid using abrasive materials or harsh chemicals that may scratch or damage the panels.
Inspecting the system regularly
Regular inspections are crucial to identify any signs of damage or degradation in your solar panel system. Conduct visual inspections to check for loose connections, bent brackets, or any signs of wear and tear. Additionally, monitor the system’s performance periodically to identify any abnormalities or drops in output. Pay attention to any error codes on inverters or unusual noises that may indicate a problem.
Handling small repairs and issues
Addressing small repairs and issues as soon as they arise can prevent larger problems and ensure the longevity of your solar panel system. If you notice loose connections, damaged wiring, or any signs of physical damage to the panels, take appropriate action to rectify the problem promptly. Consult the manufacturer’s user manual or contact a professional for advice on minor repairs and maintenance tasks.
By regularly cleaning the solar panels, conducting regular inspections, and promptly addressing any small repairs or issues, you can prolong the lifespan and performance of your solar panel system.
In conclusion, understanding solar panels is essential before beginning the installation process. By considering the basics of solar power, evaluating different panel types, and understanding the benefits of solar energy, you can make an informed decision. Additionally, taking into account the suitability of your roof, solar energy potential in your area, and local permits and regulations ensures a smooth installation process. Choosing the right solar panels involves evaluating your energy needs, comparing panel efficiency, and considering budget constraints. Proper preparation, including deciding on professional installation vs. DIY, gathering necessary tools and equipment, and adhering to safety precautions, is vital. Inspecting the roof for integrity, measuring available space, and sorting ideal roof orientation ensures maximum sun exposure. Mounting the solar panels involves understanding the hardware, installing mounting brackets, and securely attaching the panels. Wiring the system involves understanding the wiring diagram, connecting panels in series or parallel, and running cables to the inverter. Connecting to the grid requires hiring an electrician, understanding net metering, and setting up the inverter correctly. Testing the system involves checking for proper installation, verifying system performance, and troubleshooting common problems. Finally, maintenance and upkeep include cleaning the panels, inspecting regularly, and addressing minor repairs and issues promptly. With this comprehensive guide, you are well-equipped to embark on your solar panel installation journey and harness the benefits of solar energy.